top of page
WEEK 1
Introduction to the module
In our firs week for VFX Toolbox we got introduced about the module assignment (creating a title sequence). We explored some title sequences and talked about how they were created and how they can highligh the film's theme and tell a story.
My favourite title sequence is Westworld. As I find it verry impressive, I did some research and found out that for 3D models it was used Zbrush, especially for organic ones and Mata for the realization of these images The final product was made in Cinema 4D and everything was composed in After Effects. The rendering was done in Octane.
.jpeg)


WEEK 2
Introduction to After Effects
This week we learned some basic settings and techniques for After Effects by creating a basic intro animation. We made a composition, created a solid layer and a shape layer and animated a square, a triangle and a star by playing around with fill, stroke, pucker & bloat, twist, trim paths.
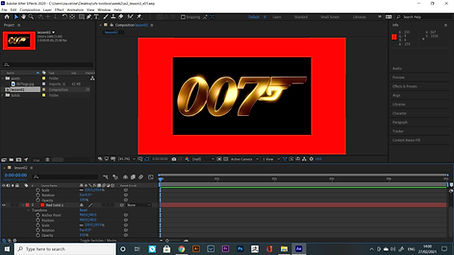

I animated a square by setting keyframes for position and scale and then I duplicated it 10 times. I aligned them by using 'distribute horizontally'.
Some useful shortcuts:
To jump on the next keyframe: K on the keyboard
To jump on the previous keyframe: J on the keyboard
To preview the composition: 0 or spacebar
To show the keyframe and expose any attributes they have: U
To duplicate: CTRL+D
To cut: ALT+[ or ALT+]
To render out I put the timeline where I wanted the video to end and pressed N on the keyboard(to render frame to frame). Then I selected the composition and added to Adobe Media Encoder Queue.
Format: H.264
Preset: Match Source- High bitrate

My final composition:
WEEK 3
After Effects Masks and Alphas
This week we learnt about masks and alphas.
Alpha Channel: white ->means solid
black ->means transparent
Note: JPEG images don't have alpha channels, but PNG images have alpha channels.


As an exercise, I cut out Craig's head.
Masking Tools: -> Shape Tools (we can draw around using different shapes such as rectangle)
Standard Settings: Mask-> Add-> to see everything inside the mask
Substract-> to cut out everything in the mask
Mask Path -> to animate the mask
Mask Feather -> to soften the edge of the mask
Mask Opacity-> to control the transparency
Mask Expansion -> the mask starts expanding outside the borders
I cut out Craig's head. I used elipse mask shape, increased the feather and decreased the mask opacity. Then, I made another mask so it looks more dramatic.


Another masking tool is Pen Tool.
The RotoBeizer helps a lot at rotoscoping and generates curves between 3 points.
Track Matte
Alpha Matte: uses the alpha channel of the layer above it as the alpha for this specific layer
Alpha Inverted Matte: cuts out and inverts
Luma Matte; works in the same way as alpha mattes, except instead of using the track matte layer’s alpha channel to determine the transparency in the composite, it uses the the luminance values of the luma matte is used to determine variable transparency
brighter shadow -> solid
darker shadow->more transparent
Luma Inverted Matte: the same as Luma but it inverts
.
I used a video showing flames (Mitch Martinez ->free assets) and the images below to create Adam's skull in flames :)


As an exercise, I created a short video using masks and alpha channels and uploaded on my youtube channel.
My final composition:
WEEK 4
Introduction to Nuke
This week we explored Nuke. We had a look on the interface and made sure that the project settings are okay: Edit->Project Settings -> fps:25
-> full size format: HD_1080
Then, we made a basic composition using image sequences
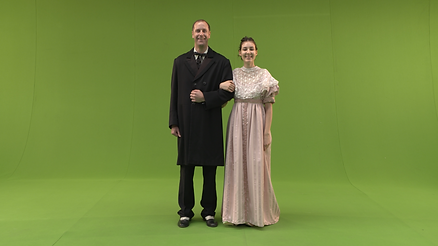
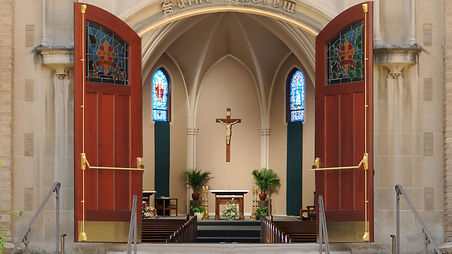
Bringing in an image sequence:
We need to make a Read Node (R on the keyboard or press Tab and write Read)
Merge Node(M):
-input B shows the background and A what it's above


We then created a Transform Node, connect it to the Read Node and scale the green screen image down.
How connections work in node graph?
If we hold down CTRL, it will appear yellow diamonds which add corners to connections so it would be visually easier to read

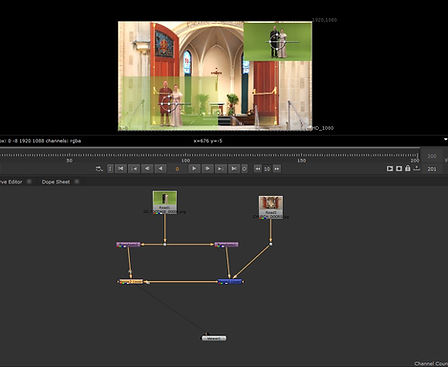

From Key Menu, we made a Key Light.
Inputs: Source ->the green screen image we put into the keylight
Bg-> background
We can also draw masks and In M is inside map and says what's the foreground
Out M is outside map and says what's the background
How to pick the green color?
Click on the black square (color picker).
Hold down CTRL and click on the green. We need to pick the color very close to the foreground we want to key.

Key Light attributes
View-> Status: shows us an exaggerated view of the key so that minor problems are shown clearly. The gray area shows the stuff we need to sort out.

-> Combined Matte: to view the screen matte, inside mask and outside mask combined.
We increased the screen gain to get rid of some gray.

-> Screen Matte: we increased the clip black
If there are black spots on the white shape we need to decrease the clip white to make them disappear
Screen Softness: to get blur
Screen Dilate: to dilate in or out

Note:
We can create a Roto Node and draw around the 2 peoplea mask using Bezier, connect Roto to Outside Mask, go to Keylight -> Out Component -> Inverted Alpha
In my composition, I didn't need to add a Roto Node


With keylight selected, we added a transform node and scaled them down by moving the pivot to their feet
Rendering Out:
Select Merge ->create a write node
File -> Render -> I set the frame range to: 1-50

We created another write node and connected it to keylight. We changed the alpha to rgba.
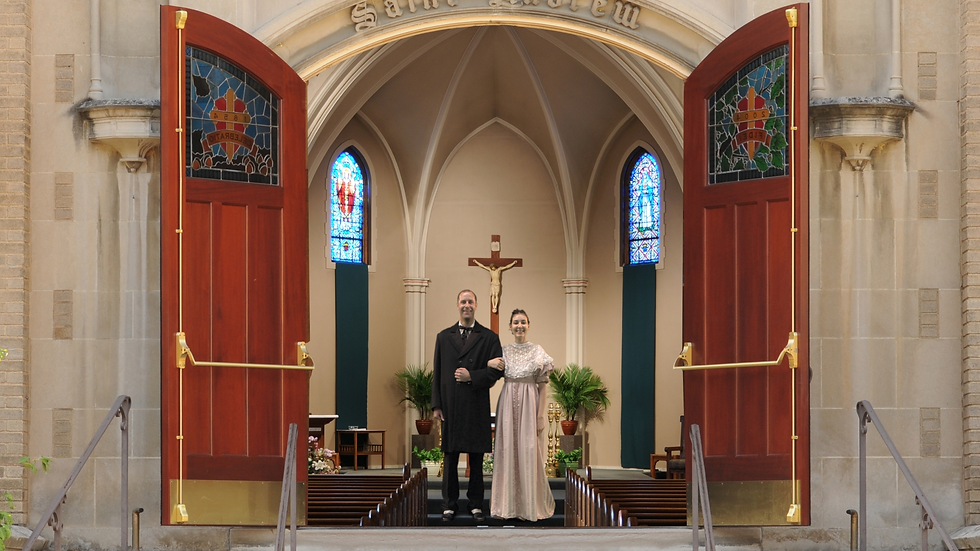
I imported the image sequences into After Effects, dragged the pictures into a new composition and played around with some effects:


My final composition:
After Effects- Greenscreen compositing
We can create the same composition by using After Effects.
I drag the assets into a new compostition, add the keylight effect and pick the green color.

Some important settings to adjust:
Screen Matte -> Clip Black, Clip White, Screen Shrink, Screen Softness
I duplicate the initial footage, put it on top and delete the keylight effect of the bottom one. I set the Track Matte to Alpha Matte of the raw file. Finally, I go to the raw file -> effect ->keying-> Advanced Spill Supressor to remove some green parts.


Final result:

WEEK 5
Nuke compositing 3D renders
This week we looked into compositing 3D renders by working with an animation we brought from Maya to Nuke
AOVs (Arbitrary Output Variables)split up the rendered image into its component parts, so we can add or remove different render channels.
We add some Available AOVs ( z, which controls the depth, coat, diffuse, specular, sss, transmition) to Active AOVs and we also add a custom AOV


HyperShade-> Ambient Occlusion
We modify the Far Clip: the closest the objects are to each other, the darker it becomes
Another important setting is Common. File name prefix shows how the folder is called,then how the renders is called.
Note: make sure that Maya AOVs is on, otherwise it will render out 7 separate image sequences


Back to Nuke, we learned how to separate out the render passes. We create a shuffle node and duplicate it 6 times (Alt+C)
Our image is made of 5 channels(diffuse, specular, sss, transmition and coat). AO and Depth are extra. We merge the 5 channels. We add a grade node to transmition to get more control over brightness and contrast.


We add a color correct node to the diffuse channel

Depth Node renders the distance of an object from the camera. We can use it to blur the image.
Note: change the math to depth
With shuffle node selected, if we add ZDefocus node, it will blur our composition. If we change the output to focal plane setup, everything blue is behind the focal plane and everything green will be on focus.


We added a constant node to adjust the background a little bit and connected the grayscale mask made by depth channel and grade to the merge node.
My final composition:
WEEK 6
Introduction to Animation in Maya
In week 6, we learned how to create basic animations in Maya.
First, we need to go to Time Slider and change Playback Speed to 25fps, because if it was Play by every frame, Maya would have played the animation as quickly as possible and we have a simple animation.

We changed the workspace to animation. In order to keyframe we can press S on the keyboard with an object selected. We can press G to frame the timeline in the curve editor.
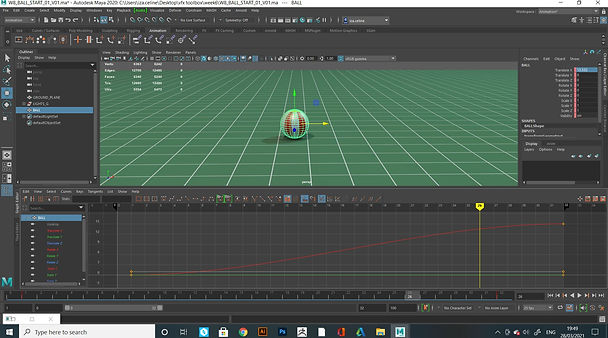
Key Feature
If we don't want to always right click to key select, we can turn on this key feature.

If we select all the keyframes and make them all linear, the ball will go up sharper.
If we flatten them, we will create a slowing down effect
Step Tangent: the object will stay at that point until the next keyframe
Unify Tangent: it locks the keyframe
Click+Shift: we can move up and down in the value


Break Tangent: it unlocks the keyframe
Hold down+Shift: it will move the keyframe in time
Assignment 1
Some other videos I made to exercise what we learned:
Some Print screens showing my workflow:


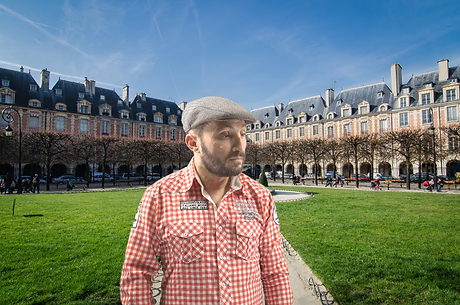


Assets I used:


WEEK 8
Maya Mash
This week we had an introduction to Mash in Maya.
First, we need to make sure the mash plug-in is loaded (Mash.mll).
I created a cube, went to mash ->apply and close.
Note: the object needs to be exactly in the middle (translate, rotate should be 0,0,0)
If we want to scale or move the object before, we need to move the pivot and snap it to the 0-0-0 on the grid. Then, modify-> freeze transformation and mash.
However, we can just group it and mash the group.

We had a look at the Mash-Distribute settings

Adding audio node:

Mash Strength:

Mash fall off:

Mash Signal Colour Node:


Mash Colour Fall Off:
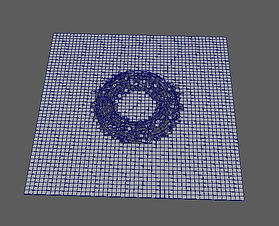


Mash Spring Node:
Mash ID Node:


WEEK 9
More Mash
This week we explored more about mash.
Curve Node:
Here, we added a color node, a signal node, an oriented node

Dynamics:
We created a cube, a sphere, a cylinder, a torus and a platonic solid. We added an ID node, a color node, a random node
Dynamics node applies the law law of physics to the object. When using Dynamics, we need to make sure that Playback Speed is set to play every frame.
Trails:
We made a random, signal, color and trial node,which generates trails from the movement of the object.


Dynamic Constraints:
Dynamic Maish Bias Offset:
Plexus Man

WEEK 10
Lights, cameras, rendering
This week we looked at lighting, cameras and how we can render out image sequences to bring into After Effects.
Maya Lights: Create -> Lights
Directional Light:
Note: turn on 'use all lights' and 'shadows' to see the light
We need to rotate it in order to work.

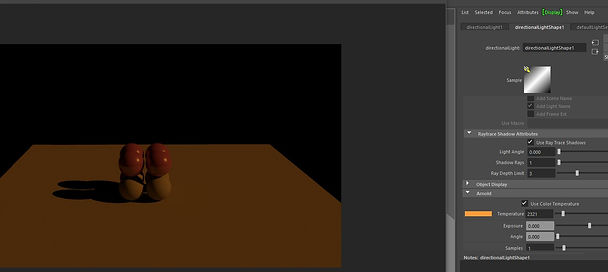

Arnold settings:
Color temperature can be explained with this image:

Angle: gives softer edges to the shadows
Sample: smooths the transition from the shadow

Point light

Spot light:

Area light:

Volume light:


Arnold lights:
Area light:

Physical Sky:
Turbidity: controls the color of the sky
Ground Albedo: controls the color of the ground
Azimuth: shows where the sun is in the sky
Intensity: the brightness of the sky
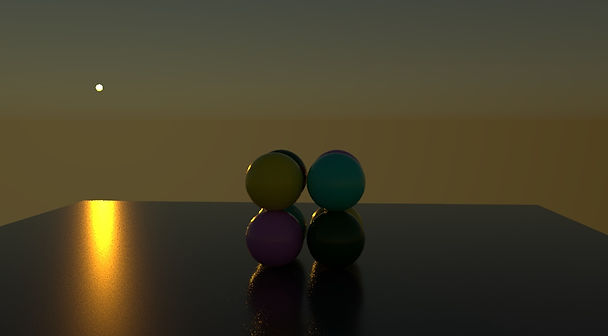
Basic Camera Settings:
Camera scale: changes the size of the camera in the scene
Far Clip Plane: controls how much the camera is rendering in the scene
Shutter Angle: controls motion blur

WEEK 11
SOUND IN AFTER EFFECTS
We can import sounds in After Effects and apply them to our compositions. We can parent the sound to the resources to make them follow the music.
We also have some audio effects:

WEEK 12
3D IN AFTER EFFECTS
This week we learnt about 3D in after effects, using some text, cameras and lights set up for the composition. We have also applied masks and layers.
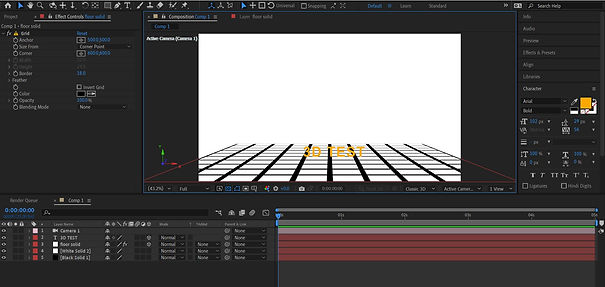

Maya Live Link plugin generates a live link between Maya and After Effects, helping us see a tab in both sofwares at the same time in order to adjust some settings in Maya and have them updated in real-time in After Effects.
For example:
Cameras (Transforms, Focal Length, Aperture, Zoom)
Spot, Point, Ambient Lights (Transforms, Intensity, Color, Clone)
Meshes(converted to solids)
Groups(converted to Nulls)
Locators (Transforms)
Planes (we have to scale 1x1 plane to adjust the size and not to use width or height)
What we can export?
Intensity, Cone Angle, Color (lights)
Potion
Scale
Rotation

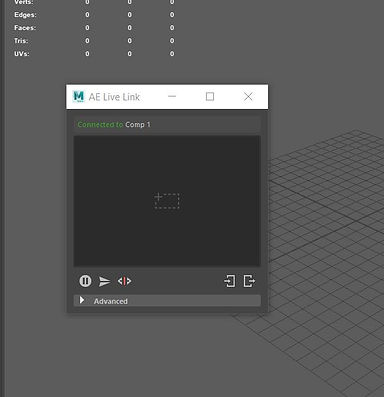
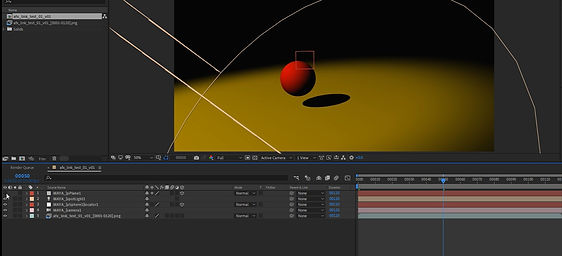
We had a look at the workflow using the Maya- AFX link by creating a scene with a plane a sphere, camera and light. We animated the sphere across the screen.
Important settings when rendering out for importing into AFX:
Renderable Camera: camera
Image Size-> Presets:HD_1080
Image format: png
Render using: Maya Hardware 2.0
Maya Hardware-> Anti-anilasing: turn both options on and sample count:16
Common -> File Output-> Frame/Animation ext: name_#.ext
Frame padding:4
In Maya we made a locator and went to Modify->Match Translation with both the sphere and locator selected and we parented the locator to the sphere. We put the camera, locator, light and plane in the AE Live Link.
Note: Maya works with frame 1 and After Effects stars with frame 0, so when we bring in a render from Maya we have to move it to frame 1

WEEK 13
CONTENT BROWSER MOCA
This week we played around with moca characters. In Window->General Editors->Content Browser. We brought a rig into the scene and from FBX we added the motion capture to apply it to the character.
Window->Animation Editors-> HumanIK
Character: the name of the rig
Source: the motion capture


We can download more assets online : http://www.autodesk.com/maya-creativemarket-samples
WEEK 14
This week we looked at adjustment layers in After Effects to change the whole general look of a composition, starting from the image below:

First, we added a camera blur (camera lens blur) to the adjustment layer and applied masks, so everything inside the mask becomes blurred. We played around with some settings such as the blue radius, threshold and settings for the masks like feather or mask expansion.

Then, we created a new adjustment layer. We added an effect: Color Correction->Curves and played around to make it look more interesting. Adding a new blue solid, creating a circle mask, feathering it and then turning it to screen we can add a tint of color.


Finally, we added a vignette. We made another adjustment layer and went to mask->new mask.
We changed the mask shape to elipse. We added the exposure effect and made the exposure super low and adjust the feather of the mask and the expansion
ASSIGNMENT 02
Preparation for Title Sequence
I chose to follow the theme of James Bond "Goldeneye" title sequence. I liked it and decided to make my shorter version.
The creative process
Keying
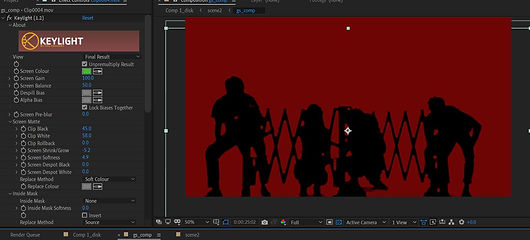
I used the footage realised at uni. In order to create silhouettes from green screen I used the Keylight effect and the Keylight settings to make it seamless and clean.
I duplicate the initial footage, put it on top and delete the keylight effect of the bottom one. I set the Track Matte to Alpha Matte of the raw file. Finally, I go to the raw file -> effect ->keying-> Advanced Spill Supressor to remove some green parts.



Following the videos from the learning materials, I made a disk using Mesh, rendered and imported into After Effects, where I used the greenscreen footage from uni. I have also added some footage from Mitch Martinez, the smoke for which I added a hue and saturation effect.

The intro part I made only from white circles. I added a few to the scene, then played around with position and keyframes and that is how they moved around the scene.

I made a 3 panel montage, inspired by a youtube video. I used matte to define the visual space of the layer. I parented the triangle layer to the matte. Setting keyframes, I moved and resized the mattes.Then, I divided the size by 3 and I played around with the keyframe for position. As the first panel shrinks, it will move over to the side. I did the same for the circles and the squares. Then, I played around with the keyframes for size and position to show all 3 panels as big as the whole scene is. I went to keyframe assistant and hit easy easy in for the keyframes.


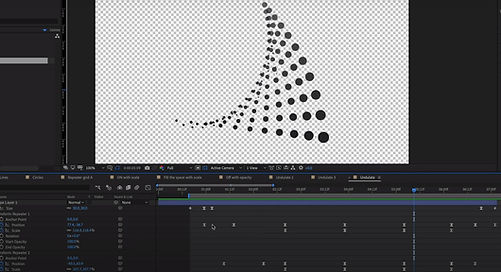
Working with repeaters was really fun, so I decided to make another motion graphic animation using them. I created a circle, added repeater twice.Then, I played around with scale,position, start and end opacity for the repeaters and this made the final shape to bend and appear to be kind of 3D

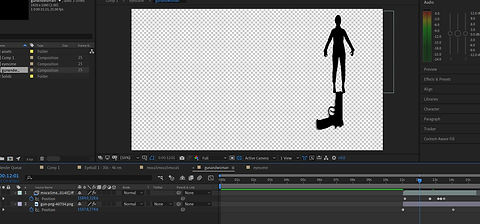
In Maya, I created and annimated some moca characters, which I imported into after effects and added a fill effect on them to make them black. For some of them, I used masks.

I made the grids using repeated shapes. I used the repeater in shape layers. I made some grids that gradually appear and disappear, changed size, density, aspect ratio. Using shape layers, I made a horizontal line, added repeater to have an arrangement of lines. On the same shape layer I added a different repeater, transformed it by its rotation at 90 degrees to make the grid.
Then, I animated the scale and position of the repeater. I have also used the scale to make the grids go away. In order to make the lines to thicken up until the background becomes the color of the lines, I played around with the scaleof the repeater and also the scale of the original shape layer. I added keframes for start and end opacity as well.



To make it more visually engaging, I added a video of an eye blinking and smoke. I added a hue and saturation effect for both the eye and the smoke.

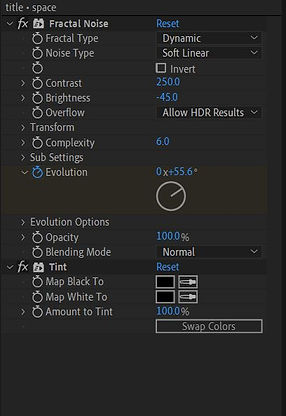


For the title, I added a glow effect on the text. I download a plug-in for the saber effect, which I found very useful as it is visually engaging. Then, I played around with some effects such as fractal noise, tint, turbulent displace, glow etc.
Following the videos from lerning materials, I created the magnifying glass efffect

FINAL OUTCOME
bottom of page