WEEK 1 & 2
Digital Matte Painting
In the first 2 weeks of the module, we learnt the basics of digital matte. We used Adobe Photoshop to create the first three projects which represent a matte painting of the following themes: Skyfall (James Bond), Bladerunner, and a Savannah landscape.
A matte painting is a painted representation of a landscape, set, or distant location that allows filmmakers to create the illusion of an environment that is not present at the filming location.
Complementary colours
Two colours on opposing sides of the colour wheel are complementary.

Blade Runner

Reference images:


Breakdown:
Feedback:
-colors of the car don't match -> contrast needs to be higher
->black level needs to be the same as the ones of the rest of the images
->the car is too bright
Skyfall

Breakdown:
Reference images:


Feedback:
-the shadow of the boat is too sharp
Savanna

Breakdown:
Reference images:


Matte Paintings:
Final adjustments after feedback and breakdown:
WEEKS 3,4,5
Wall-E Brief -> Live-Action Reboot
Moodboard


Final Maya Scene:


Camera Movement Test:
Extracting clouds (Photoshop) and rendering them in Maya with the camera movement


Final Nuke Script

Breakdown:
WEEK 6
This week we had a masterclass with Matt Jacques.
In the first day, we were provided with footage such as background, characters, gun smoke, muzzle flash and blood splat and we created an indy composition. A piece of advice we got was that whenever we are doing a comp, we should have the background, individual characters and shadows on separate layers.
We merged all the assets together. When grading the blood splat and gun smoke we first added unpremult node, grade and then premult.
Note:
By default, this node divides the input’s rgb channels by its alpha. If your input images are premultiplied, this can make color corrections more accurate.
When you color correct premultiplied images, you should first connect an Unpremult node to the image to turn the image into an unpremultiplied one. Then, apply the color correction. Finally, add a Premult node to return the image to its original premultiplied state - this last step is important if you want to merge the image over another one, as Merge nodes in Nuke expect premultiplied images.
Typically, most 3D rendered images are premultiplied.
To make the comp more interesting we added camera shake when the character gets shot and played around with amplitude and frequency. Camera shake should only be 8 frames


We used ZDefocus node and we changed the math to far=-1

We wanted to create a blood effect coming from the character when he gets shot. We did this with the help of a red constant and a roto paint brush. After we drew the shape, we graded it with hueshift node and also added edgeblur. Then we animated it

To make it look cinematic, we created a vignette effect, by adding a black constant. We made an ellipse roto shape, inverse it and blur it up to the size of 250.
Finally, we added godrays where we kept only the green and blue channel to obtain a bit of color abberation. Finally, we added grain

Final Comp:
Breakdown
Exercise 2: Rope Scene (marking removal & keying)
In this exercise, we looked into advanced Marker Removal skills in Nuke. As there were many markers in the background, removing some of the markers that were disappearing behind of Rifle Gun and some cloth required a lot of patience.

Marker Removal:
The easiest way to remove the markers is by tracking and putting a Roto around the marker. Then, I connected to the 'Mask' pipe on the 'Keymix'.
We can test if the tracking is accurate by bringing a 'constant' node and connecting on A pipe of 'Keymix' node.
If a marker goes behind the subject, we can use a multiply node and animate it on/off.

When a marker goes behind of Rifle, I put a Roto shape on Rifle and connected it to the Merge(Stancil) node
I added Rotopaint and put 'Clone' paint around the Rifle Muzzle.


Keyer node:
I used 'Primatte' or 'Keylight' keyer nodes to get the foreground's alpha channel when markers go behind hair/ clothes. Then I used 'Stencil' the Merge node to take the alpha channel out.


Final CleanPlate:
Adding Background:

Breakdown and Final Comp:
WEEKS 7-11
Christmas Advert
The next brief is to create a Christmas Advert.
First, I did a bit of research .
Tea Advert
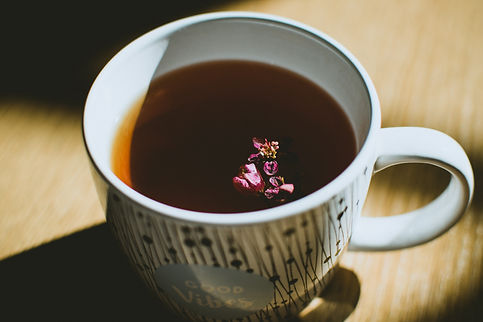
My second idea, and the one I'm gonna follow, is to make a tea advert. I plan on shooting my shot at my workplace's reception. Because winter time is very busy at my work, my idea is to advertise a tea that people choose to drink to relax.
Action Plan:
-use 2D live-action footage and 3D assets
-3d assets: model and texture half of a lemon that I will add to the Nuke file
-shoot a short video at reception with the desk, and maybe someone working there
-use a tripod, not camera movement, so no need to track it
-use greenscreen to film some flowers/dried leaves floating into a glass filled with water that I will later composite into my footage
-final compositing will be done in Nuke
Camera Movement:
-still camera, no movement
Moodboard:


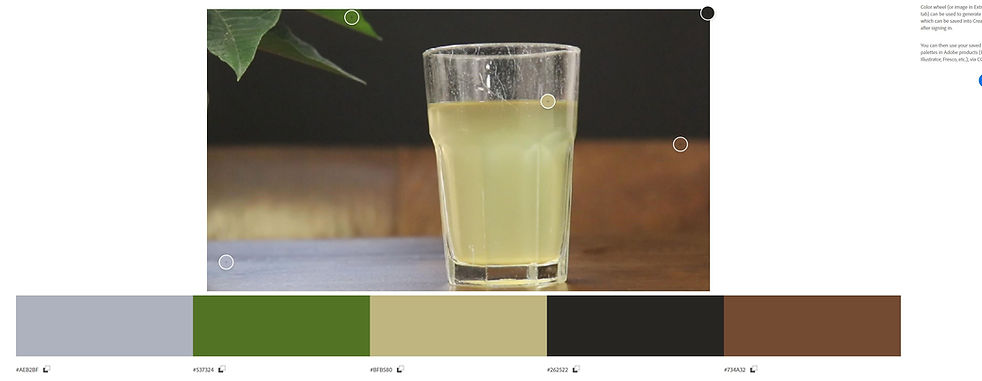
Color Palette:

Shooting my shot (TEST)
Next steps:
-shoot a close up shot with the glass like the one below to see if it works better

Shooting the Final Shot:
Next steps:
-model and texture a lemon
-need to work on the luminosity of the lemon and on the shadow as it's too dark
-ideas of leaves floating into the glass:
Shooting my own stock footage:
- without getting any reflections, I tried shooting my own stock by filling a jar with water, mixing some flowers and then adding boiling water so they will move
-my plan is to make the footage slower in nuke and composite it into the glass
Cleaning up the glass
-I removed most of the scratches of the glass by using rotopaint node


Finally, I grade the comp and added a vignette effect and lens flare


Final Comp:
Breakdown:
WEEKS 12-14
Challenge
For the final brief, we were allowed to create whatever we like. I decided to make a matte painting in Nuke and to composite an explosion.
Moodboard:


Images I used in my matte painting:


Final matte painting (before and after grading)


Next, I composited in the explosion and the flash. I animated everything to light up when the explosion starts.


I installed a heatwave gizmo plug-in and I applied to the grass when the flash starts.


I applied lens flare.Then I blocked out the lower part of the frame by using a letterbox aspect ratio. This will draw our eye toward the location of the explosion + make everything feel bigger! This is because the explosion will now take up more vertical height within the frame.
Finally, I created camera shake, vignette and grain.


Final comp
Breakdown:
SHOWREEL
LIVE BRIEF
MasterClass: Rope Shot Final Adjustments
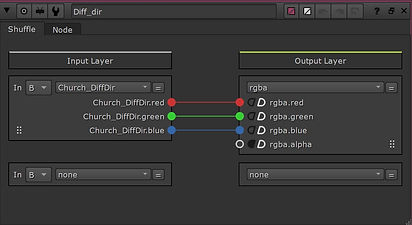
In the next masterclass, we continued working on the rope shot. First, we learned how to set up Blender AOVs. Our background was made from CG elements, and we had to set the AOVs that were made in Blender. To do this, we used shuffle nodes, changed their channels, and then merged them with the plus operation. With LayerContactSheet, we can see all the AOVs.The advice we got was to use Maya, instead of Blender.


We then applied HairKeyBright which is an additive keyer. We did Despill Matte Extraction by using 2 keylight nodes, filter erod, clamp and edgeblur. Finally, we applied muzzle flash. We made them appear only when the subject has light on him, so we achieve interactive lighting. By utilizing 4 different muzzle flashes, we animated a switch and an opacity slider (which was a multiply node). Finally, we had to match the grain of the comp with the grain on the muzzle flash.


Final Comp
Breakdown