PERFORMANCE ANIMATION
WEEK 1
QUAD DRAW
In the first week of this module, we got introduced to 'Quad Draw' tool in Maya which is used for retopology. With quad draw, we create polygons by manually plotting points.
Modeling Toolkit->Quad Draw
The exercise for this week consist of recreating the form of my face using quad draw.
Before using quad draw, we need to make sure that the object we draw on is in 'object live' mode.
I checked the keyboard shortcuts in order to get familoiar with quad draw.


First, I created a plane and brought in a reference image. I made the reference mesh live and then, I started creating vertices by dropping dots. The whole process consisted of adding faces (by dropping dots) and extending edges.

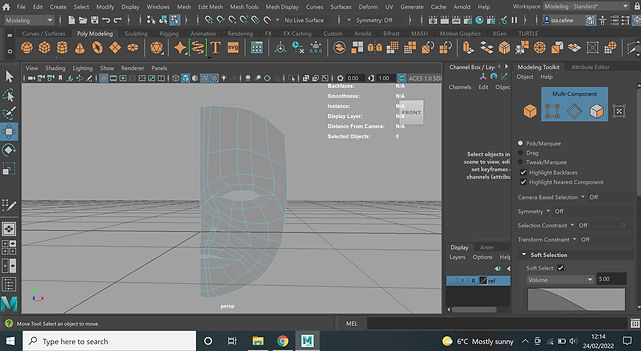

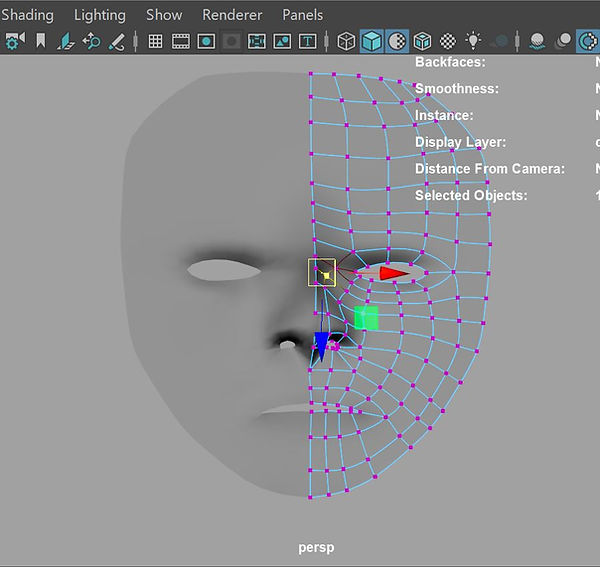
After I finished quad drawing half of the face, I used Soft Selection (B on the keyboard) to form the face. I selected the middle line of the face and scaled it in order to straighten it.
Note: The pivot point needs to be located on the y axis.
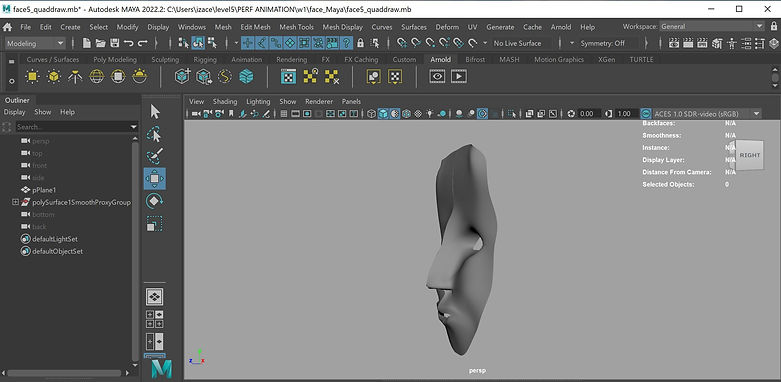
Then, I created the other half of the face: Mesh->Smooth Proxy->Subdiv Proxy
Subdiv Proxy Options: Setup-> Mirror behaviour->Half
Mirror directions->-X
Subdiv Proxy Shader->Keep



Quad Draw Tutorials:
WEEK 2
RETOPOLIGISE ZBRUSH
This week we focused on the understanding of how to create decent face typology.
For the first exercise, I started with DemoAnimeHead and I used Topology brush to 4 draw lines.
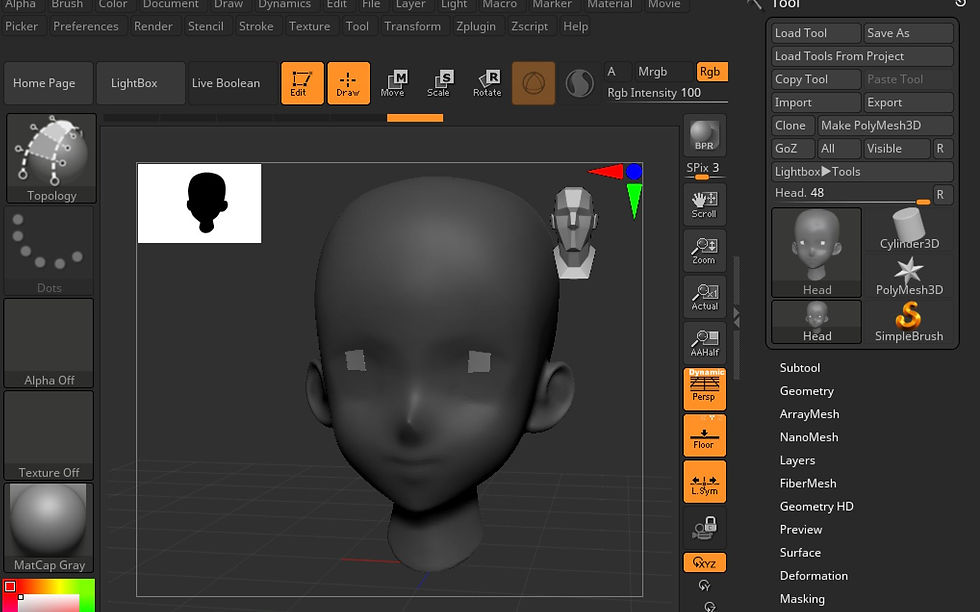
Then, we need to split it to similar parts (Subtool ->Split ->Split to similar parts)
Turn on Polyframe and Transparency, turn off Ghost
With ZModeler brush we can start extruding edges.
While using the ZModeler brush, hover on -> the polygon and press spacebar to see the menu ->choose 'Do nothing'
->the edge ->extrude->edge loop and snap to surface
->point ->snap to surface
Note: uncrease!
Geometry->Crease->Uncrease all


When the face topology was rebuilt, I subdivided the mesh to make it look better and applied projection.


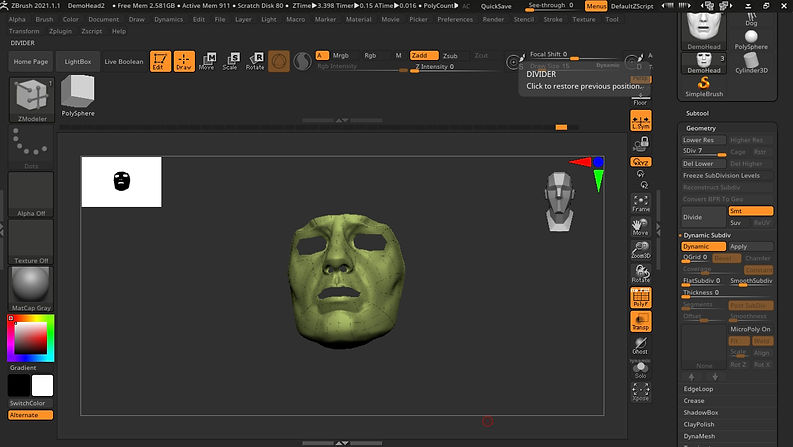
In this second exercise, I used another DemoHead in which I used again the modeller to create a simple face mask. The methods that I used was the same as the previous one.


WEEK 3
Hard Surface Modelling - ZBrush
In the third week of the module, we had a look at hard surface modelling in ZBrush. We used tools like ClipCurve, TrimCurve, SliceCurve etc.
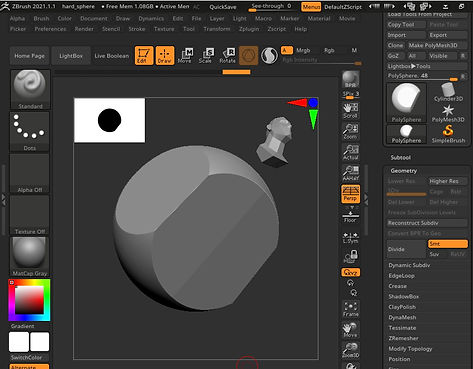
Clip Curve Tool
Clip Tool Shortcut: BCC
We need to hold down ctrl+shift to use it
Example:
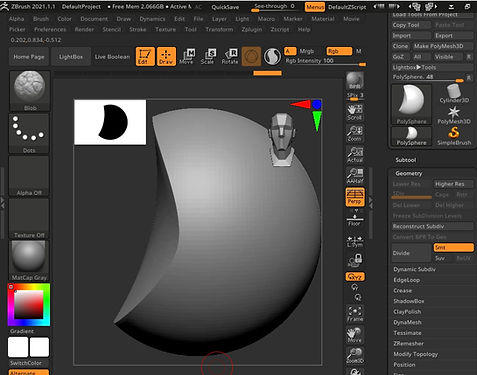
Trim Curve Tool (BTU)
Note: we can hold down tab+alt to create a curve
Ctrl+shift+alt+double tab-> it will make a straight line
We can click on spacebar and turn bradius on

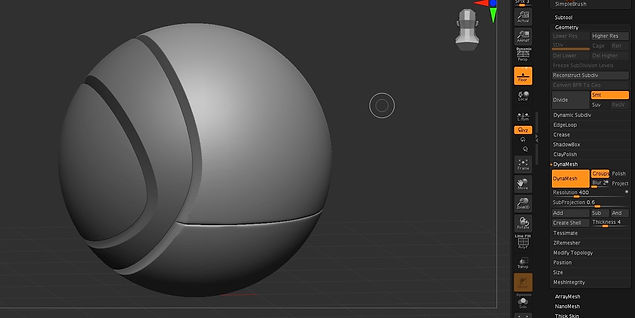
Slice Curve Tool(BSI)
It works with poly frame on
Geometry->Dynamesh->make the resolution higher and turn on groups
Alpha Star
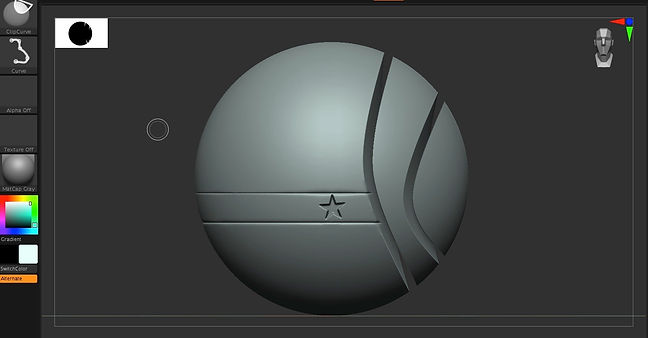
Then, I added a smaller circle and I used the alpha tool to create a dot in which I then used the transform tool to push it back. I made another circle to push that one forward.

Using alpha, I imported a png image andI pushed it forward.

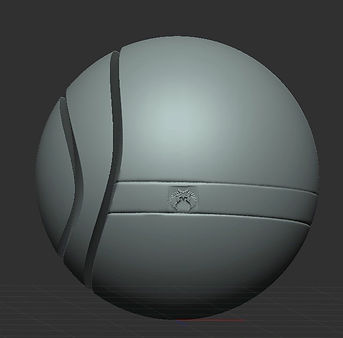
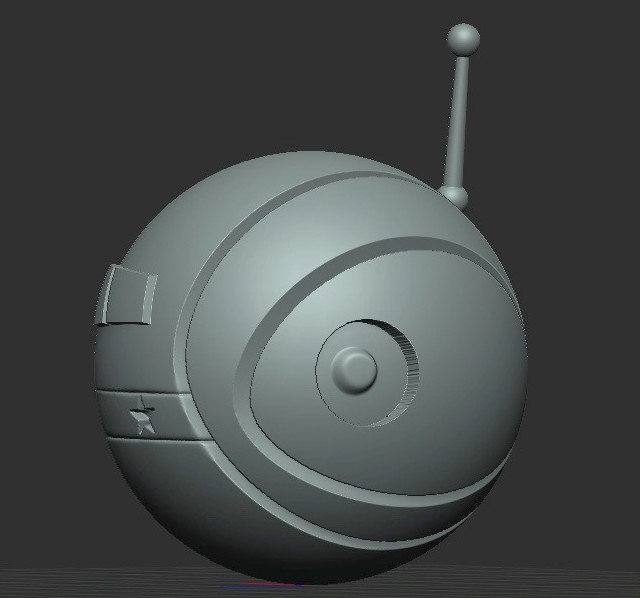
I created an antenna by appending in 3 spheres. I adjusted their position and then, I connected them up with the transform tool while selecting a half of one of the spheres to act as the connector between them
WEEK 4
HumanIK in Maya. Simple Rig
This week we looked at Maya rigging system (HumanIK rig). We were introduced to painting weights in Maya.
We defined a skeleton character and then we applied motion capture to the rig.
Steps after importing the skeleton:
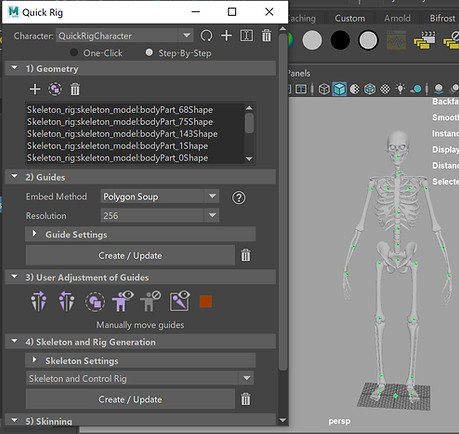
1.human IK tab, select quick rig tool ->step by step and click on the plus sign
2.select the entire mesh and click on the plus sign under geometry to add it to the tool
3.Guides->Embeded Method->Polygon Soup->Create Update
4.look at the position of the joints and adjust it if needing. Note: try not to move the legs joints in X-axis and use mirroring
5. Skeleton settings ->skeleton only->create and update
6.Skinning->GVB->Create and Update

7.Import mocap data
8. Select the root, go to Select -> Hierarchy and then zero out the rotation->rotate X 90 degrees.

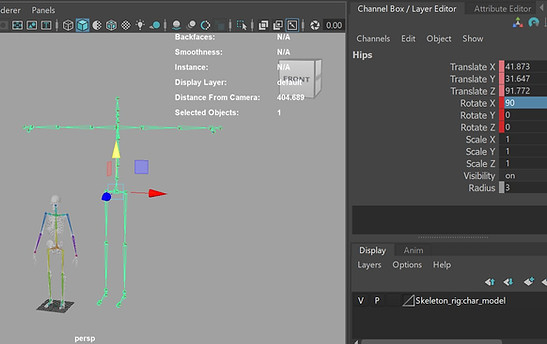
9.define the character: select None for the Character-> Create Character Definition.
10.select the joints, then right-clicked on the corresponding bone and choose Assign Selected Bone. I named it MC
11. character is skeleton, source is MC.
If some parts of the mesh pop out unnaturally, I need to set the 'Paint Skin Weights' on the mesh.
WEEK 5
Substance Painter Workshop
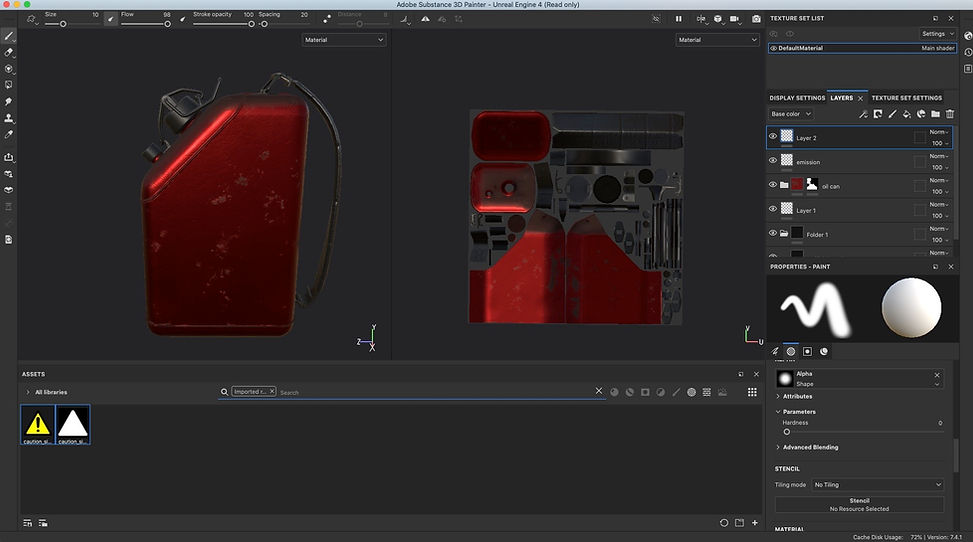
In this week , we had a look at substance painter in more detail this week as we had to texture an oil can in substance painter. I first imported the oil can into Substance Painter and made sure the texture resolution was set to a high one. I needed to bake the model because the oil can hada lot of polys that were not needed for texturing.
The output size was 4096.I then started texturing the oil can by adding the brass pure texture and applying a black mask to the oil can so I can only texture certain areas of it.
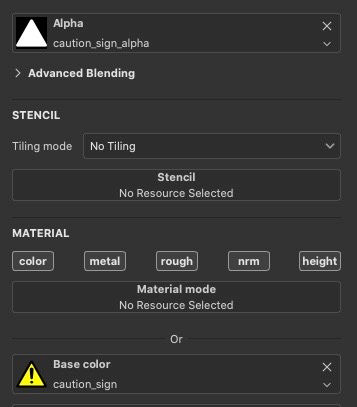
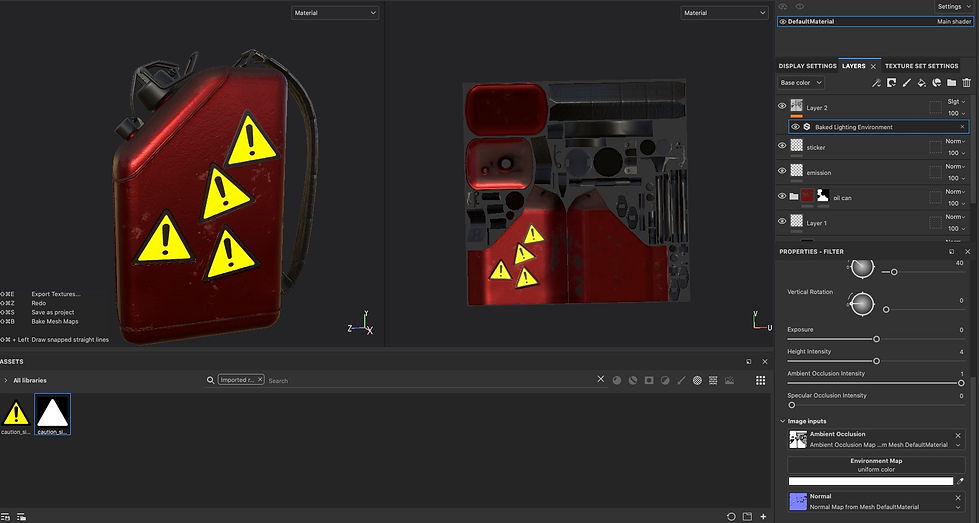
I changed from the brass pure texture to a dynamic texture because it comes to additional maps like rust and dirt .Next, I added a e warning texture. In order to do this, I downloaded a png of this texture online and adjust it in photoshop to add an alpha layer so I could use this in Substance Painter. Once in Substance Painter, I used the brush tool to apply the texture on a side of the oil can.


WEEK 6
This week, we work again on the pipeline for getting a ZBrush model into Maya by using the ZPlugin tools and then rendering it using the cat Clark render tool. Below are my processes for this week.
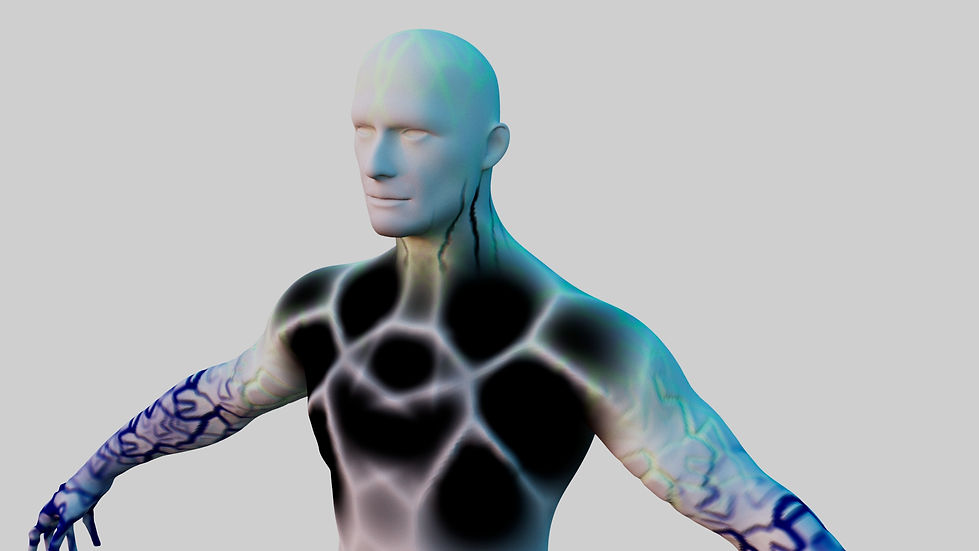
I have imported a simple demo model in which I painted the body and the face. I made sure the model was high poly as it will have an impact on rendering it in Maya.
I then cloned and unwrapped the model in order to have the data compiled into Maya for texturing. 'Work on clone' button clones the high mesh model into a low mesh model so ZBrush can unwrap the model better.
The next step is to export all the required maps needed to apply this data onto the model in Maya.
Maps necessary for exporting:
Displacement, Texture from Polypaint, Export Mesh.
Back to Maya:
I imported the model from Zbrush into Maya and I applied Arnold Standard Surface Shader.
I added the displacement map and the texture from polypaint.
To achieve the final render above I created a skydome and also made sure that the Arnold cat Clark settings were set to an iteration of 5 since this was the amount of subdivision levels that I had in ZBrush.
Finally, I applied a skydome light.
Note: I set the Arnold cat Clark iteration to 5 because that was the number of subdivisions levels that I had in Zbrush.
Renders:
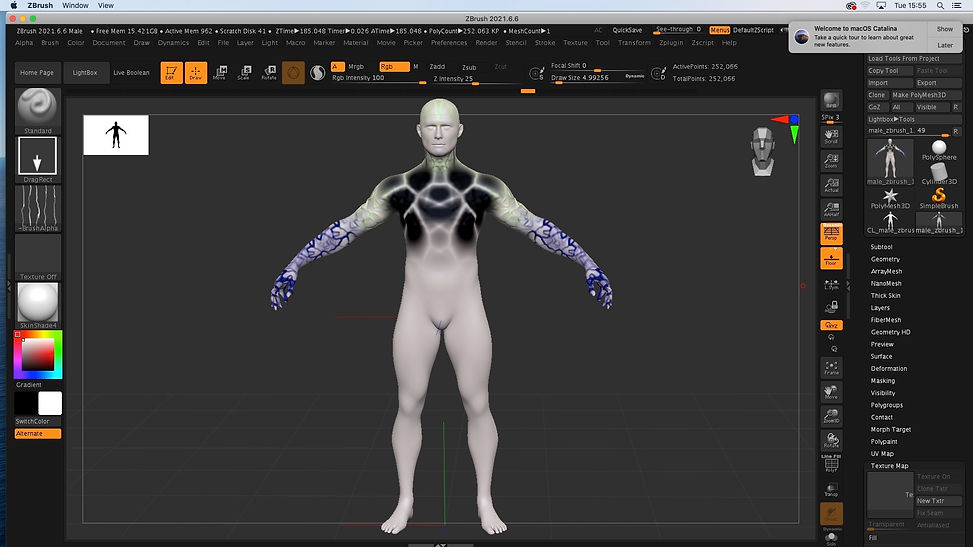

Maya ZBrush Pipeline- Recap

WEEK 7
One to one Tutorials
In this week, we had one to one tutorials to make sure that we are up to date with what we learned these weeks and to clarify all the questions that we have about the first assignment which consist of creating a mechanical rig that will work well with motion capture applied.
WEEK 8
Substance Painter (photo-realistic texturing)
This week we had again a Substance Painter lesson and we learned about how to achieve a photo-realistic texture.
Particularly, we talked about PBR texturing which includes multiple maps: normal, specular, albedo, roughness.
We used a low poly monkey that we baked in Substance Painter using its high poly obj. We need to increase the max frontal settings in order to have the best result on the baked maps.
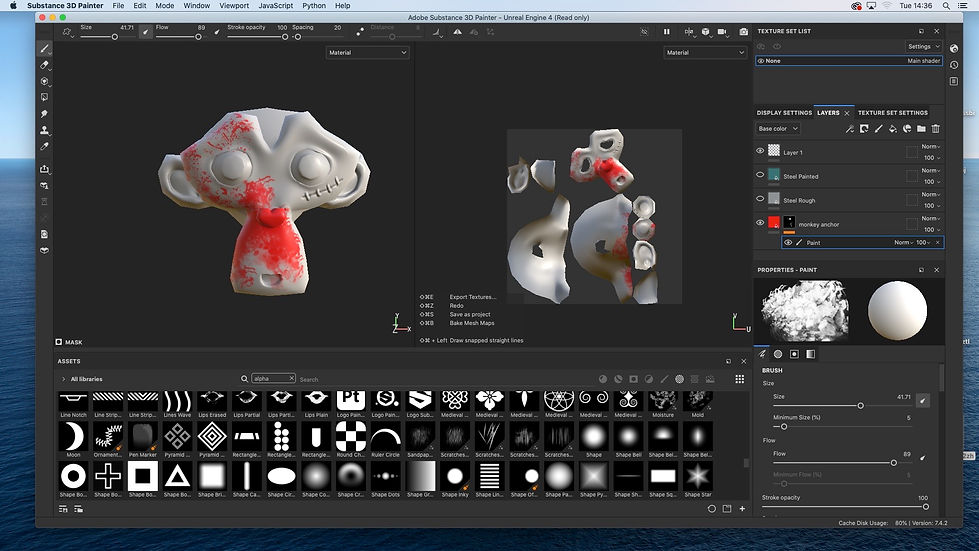
I applied 2 textures to the model: 'Steel Painted' and 'Steel Rough'. Next, I created a new layer 'monkey anchor' which I used for creating alphas with the help of the paint tool.

Then, I painted over the model using a stencil that I downloaded online and the paint tool. When working with the stencil, I hided 'Steel Painted' and 'Steel Rough' layers.
I then started painting over the monkey with a stencil that I have imported from the internet using the paint tool. I have applied this stencil over various places as seen in the image above.
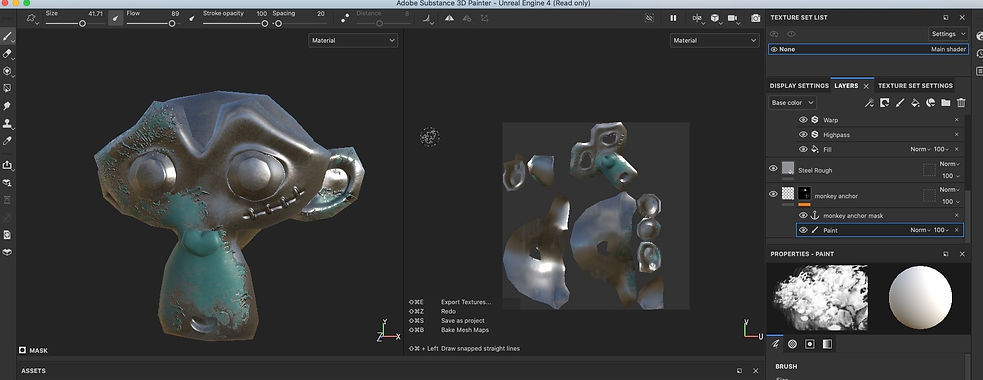
Next, I added a fill layer to 'Steel Painted' layer that includes the anchor. I unhided the 'Steel Painted' and 'Steel Rough' layers
Finally, I added the last texture: 'Rust Fine'. In order to enhance the credibility, I applied levels, wrap, highness and a fill layer to add the anchor point.

Assignment 1: Motion Capture Preparation - Character Development
For the first assignment, we had to develop a mech character that will work well with motion capture applied. We ales had to rig the character in Maya. Through my process, I used different methods learned in this module such as Quick Riging, Character Definition (Human IK) in Maya, the steps for applying mocap data, painting weights, and skinning.
Below are my developments for this assignment.
First, I chose some reference images:


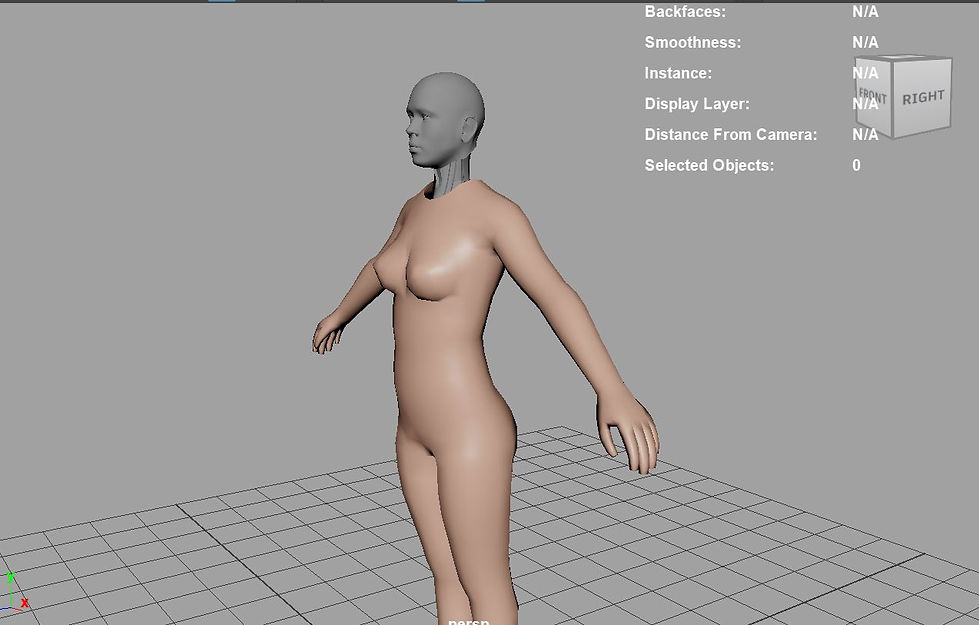
I chose the female character from content browser, I replaced her head with one I found online and I modeled the neck. I countinued with the chest, spine and arms. As it can be seen, some faces became black. I couldn't figured out why this was sometimes happening, so I just unlocked normals and reversed them: Mesh Display-> Reverse. After doing the arms, I have also rotated them to be straight as it would make the rigging easier. Then I made the leg and I mirrored it. Finally, I added some details, I modeled a helmet and I finished the body.


Rigging Time!
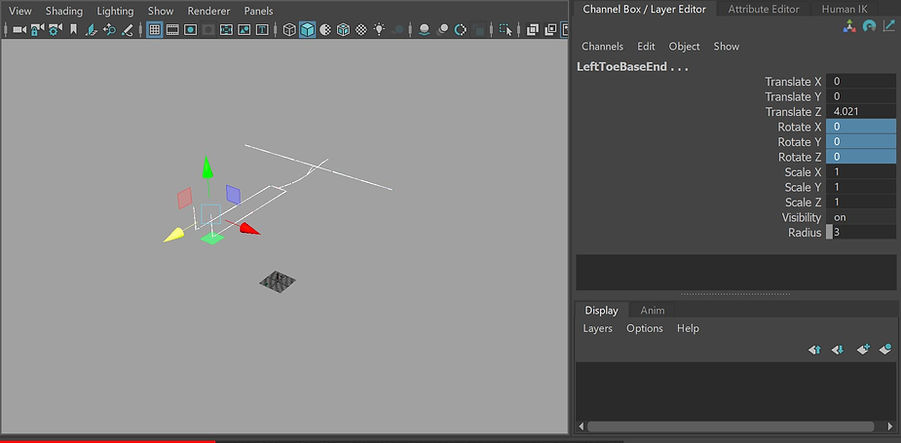
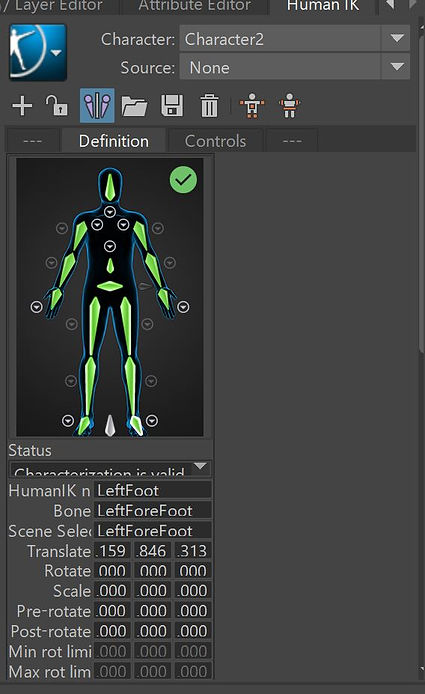
After the modeling was done, I then set up the rigging of the character. In HumanIK, I used quick rig tool. The embedded method was polygon soup. Then, I moved the joints to fit correctly my model. I applied skeleton and rig generation to skeleton only and GVB was the binding method for skinning.

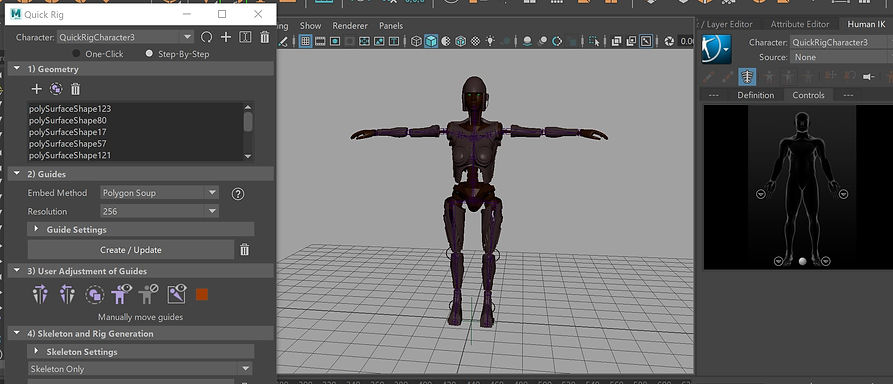

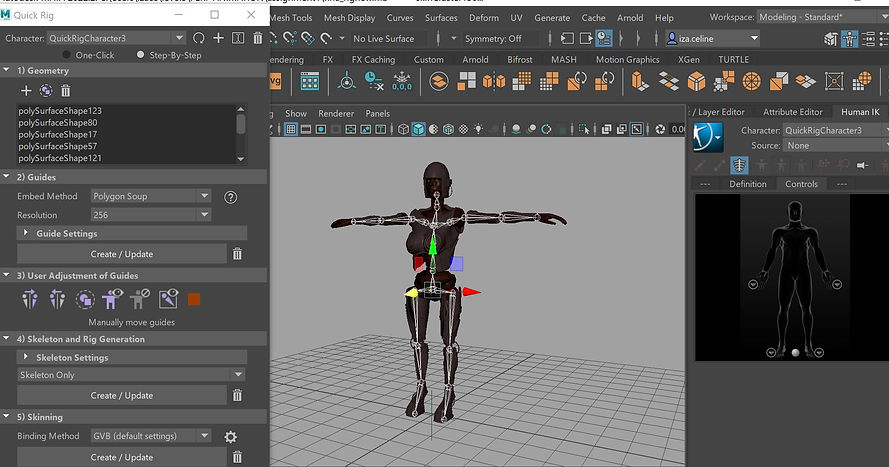
I then imported some mocap data. I prepared the mocap data by putting the imported skeleton in a T position.
Select->Hierarchy and all the rotation axis set to 0. Then, I selected the rig and I set rotate X to 90. I went then to HumanIK-> Create Character Definition and assigned the joints. The character is the skeleton (the quick rig I made), the source is the mocap data.
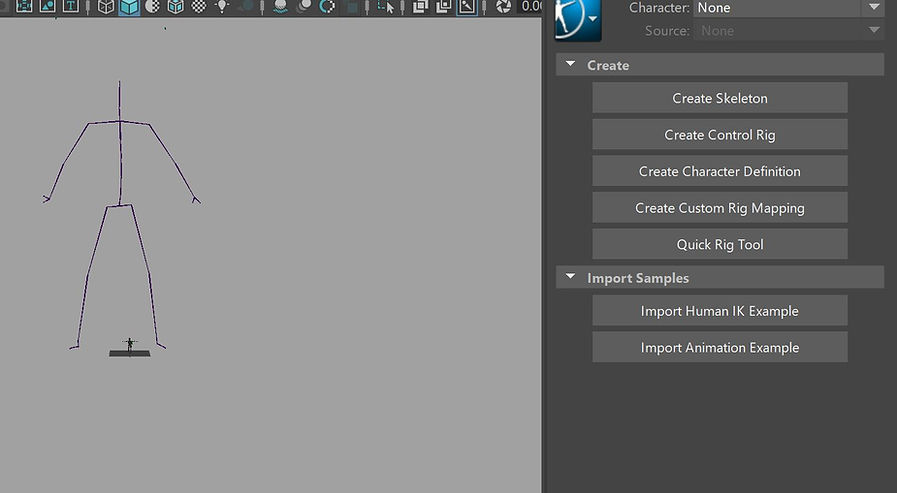

To make the renders more engaging, I added a skydome light and I imported a hdri image which I set the camera visibility to 0 and a camera.
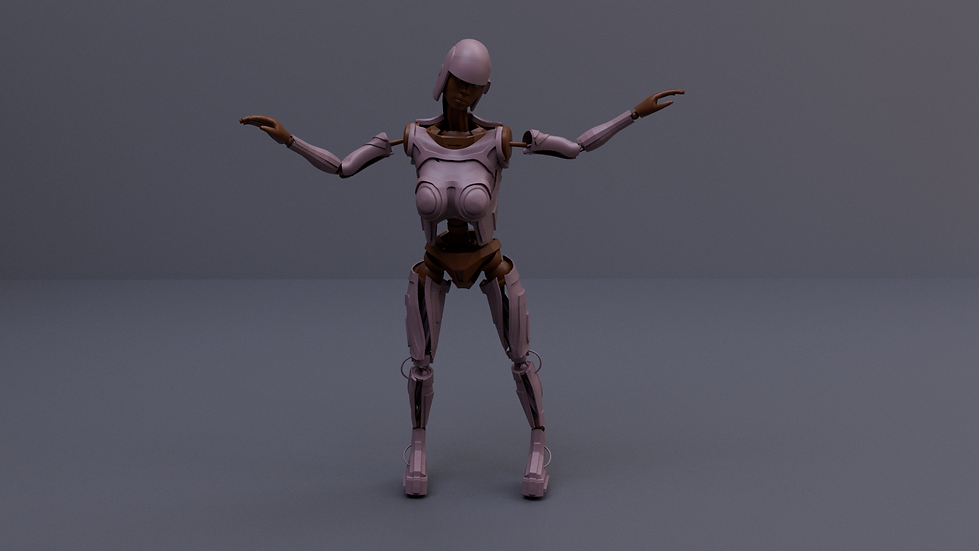
Final Poses:



WEEK 9
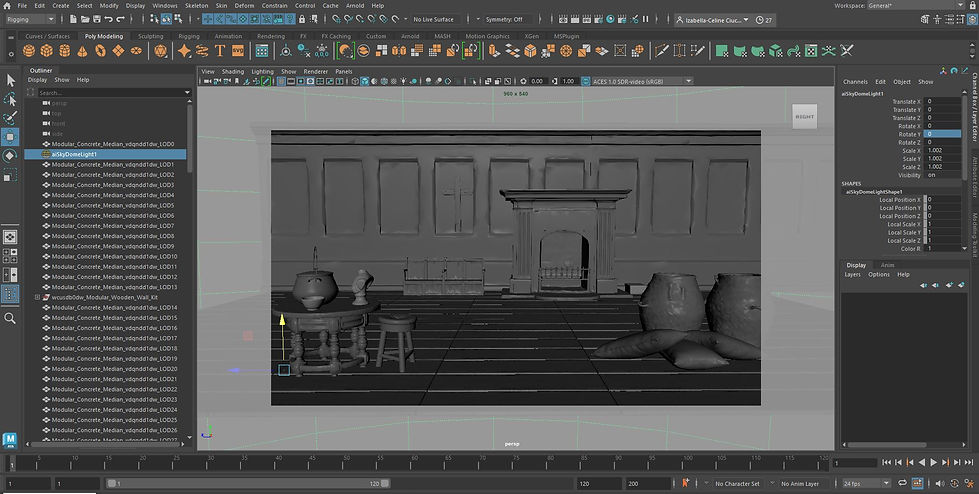
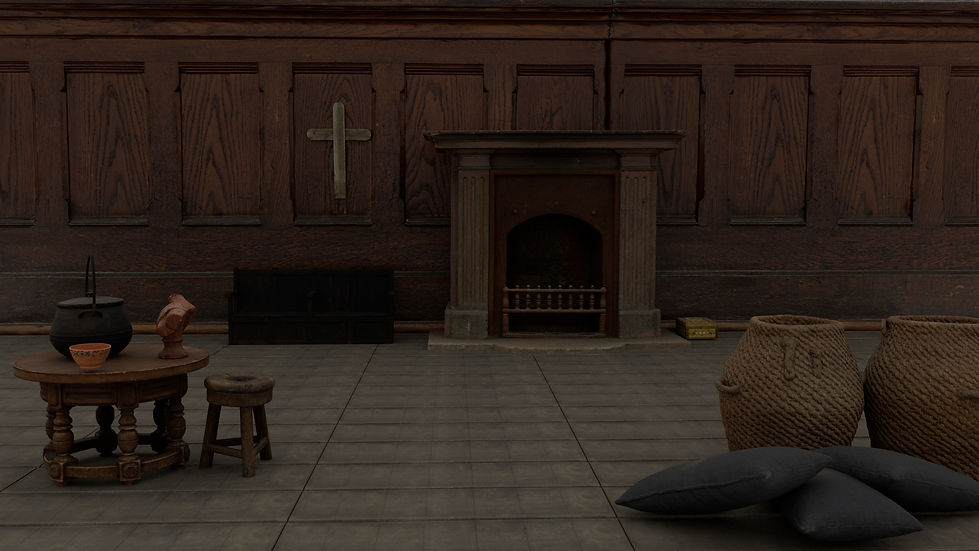
This week we looked at Mixer and Bridge and we talked about importing assets from Bridge into Maya. We focused on creating an environment for our character. I explored the interior 3d assets and created an old room.


WEEK 10
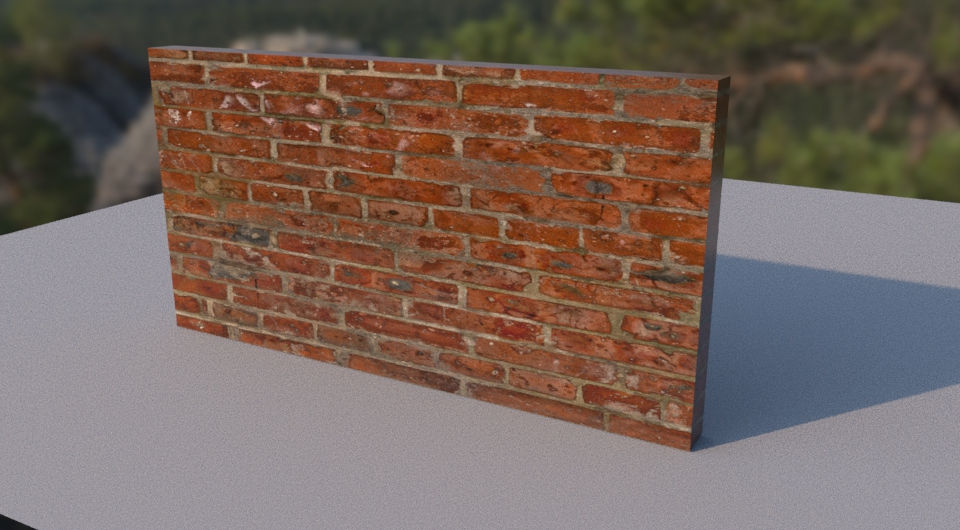
This week for the module, I have had a look at Mixer and how to create and implement my own texture onto an object. I have also continued to look at Bridge as I used the textures from that software to implement them onto an object within Maya. I created a brick wall using Bridge.
I have imported a texture from Bridge and placed it onto the 3D wall I have made.
Because I have imported the texture from Bridge, I already had the premade displacement map that I turned on by setting the wall to a setting of linear under the Arnold settings for the object as seen below. By using the Cat Clark/linear rendering tools I am able to make the wall in the render above look more 3D rather than a 2D surface.
Note: the higher these iterations go the longer the render times will be.
Introduction To The Basics Of Quixel Mixer
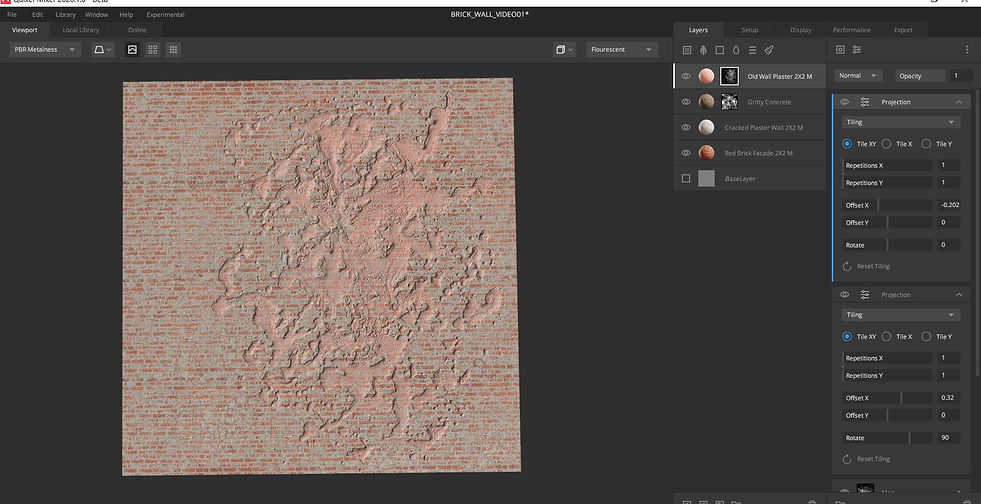
Next, I have imported the brick texture into Mixer and I have played around with the settings to set the scale and tiling of this texture.I have above added another surface texture and I used the blend settings to mix the two textures together.
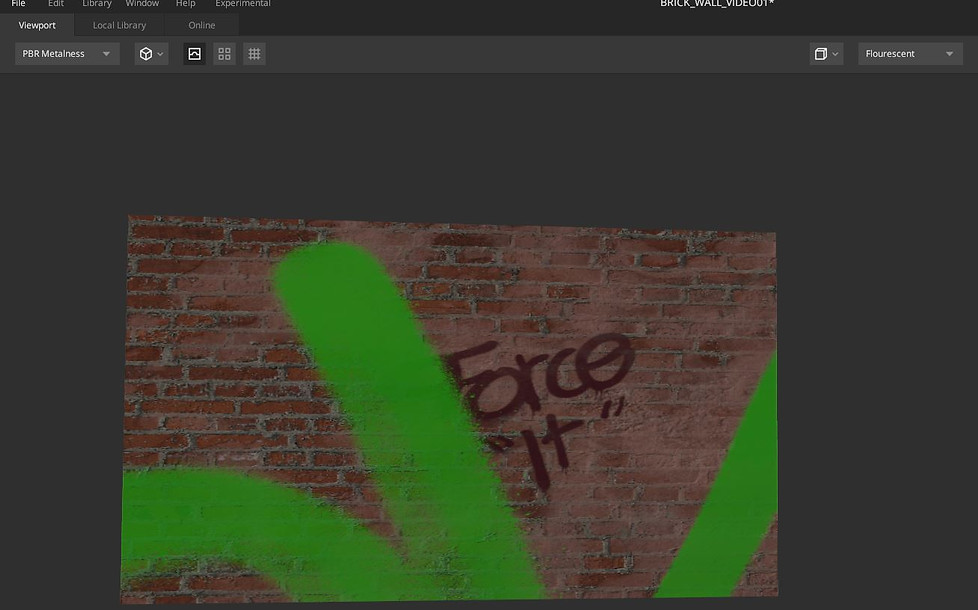
Then, I added some graffiti. Finally, I exported the 3D wall model and texture that I have made in Maya. To import this I just had to export the model as an FBX

WEEK 11& 12& 13
These weeks we focused on working on the second assignment which includes creating an environment for the mech character and applying the motion capture data. I mostly worked on texturing my character in substance painter, applying motion capture and painting weights on some areas that were not accurate. Then, I started creating an environment using Bridge.
.
Assignment 2: Motion Capture Scene
For the second assignment, we were required to apply the motion capture that has been generated in the Motion Capture sessions to our character. We also had to place the character within an environment.
First, I textured my model in Substance Painter:

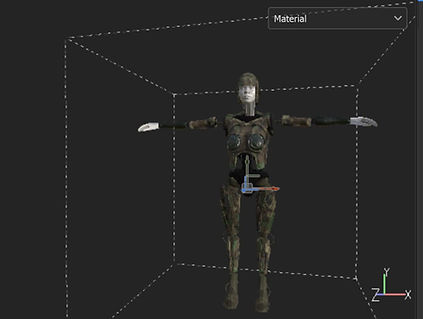


I then, applied motion capture to my character. I set up the rigging of the character. In HumanIK, I used quick rig tool. The embedded method was polygon soup. Then, I moved the joints to fit correctly my model. I applied skeleton and rig generation to skeleton only and GVB was the binding method for skinning.
I then imported some mocap data. I prepared the mocap data by putting the imported skeleton in a T position.
Select->Hierarchy and all the rotation axis set to 0. Then, I selected the rig and I set rotate X to 90. I went then to HumanIK-> Create Character Definition and assigned the joints. The character is the skeleton (the quick rig I made), the source is the mocap data.
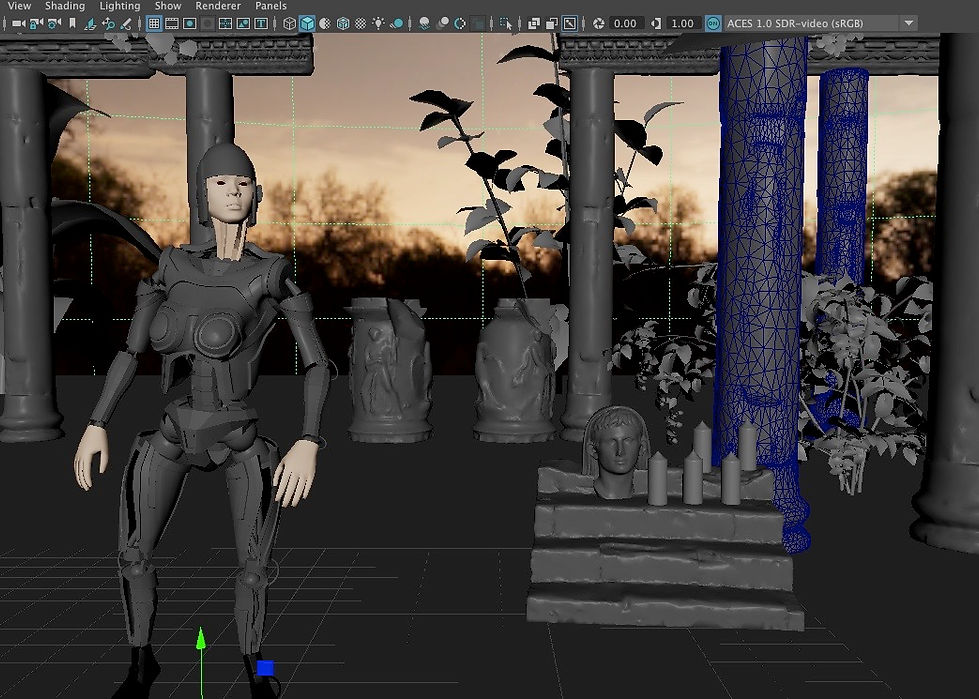
Finally, I created the environment by using Bridge.
.jpeg)
.jpeg)

Final Animation: